Tangoe Telecom SOAP API
STANDARD OPERATING PROCEDURES
Process Requirements
Purpose
This document describes how to set-up a client configuration so that one can explore and get familiar with the Telecom Web Services before starting to design and implement their client application.
The first part presents how to set-up SoapUI tool as the client part of the integration.
The second part provides with a handy method of generating the hashed password that the client must include in the WS security header of every request.
Technical Description
SoapUI Tool as Client
In order to be able to interact to Telecom Web Services, one can use SoapUI, one of the world’s most popular API testing tool. For more information on SoapUI in general (where to download it from, tutorials, configuration etc.) visit https://www.soapui.org/.
After SoapUI is downloaded and installed the following steps shall be followed so that everything is configured and the client may start interacting with Telecom Web Services.
1. Create a new SOAP Project
- Press the SOAP button in the top left corner.

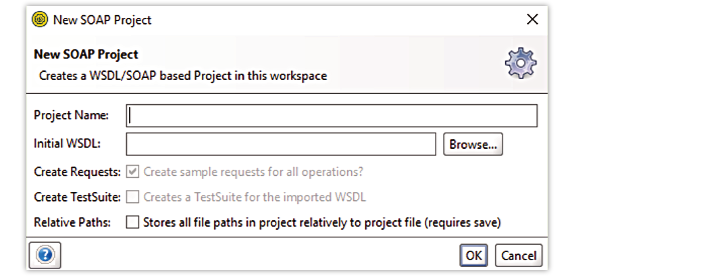
- Provide the Project Name and the Initial WSDL, tick Create Requests option and press OK
As a sample, the below included WSDL is the one used in version 20.2.
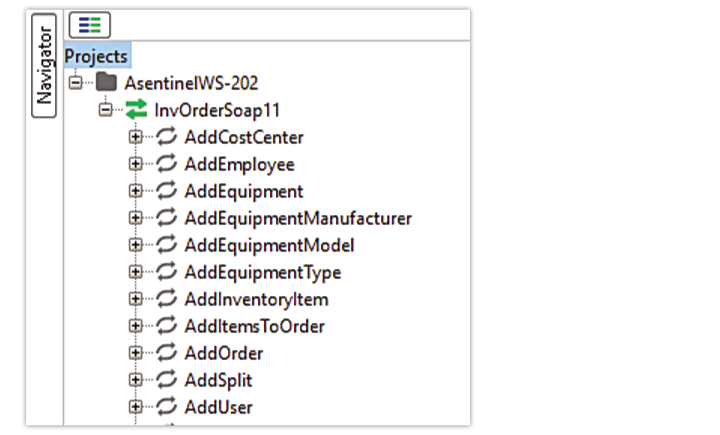
After completing these operations, the left navigator shows the newly created project, with sample requests for all endpoints exposed as part of the WSDL.
If the Telecom Web Services the client interacts with is not secured, this configuration is enough. One may start sending requests and observe the server response. In case the server is secured, follow the coming steps.
The server-side security layer is configured in TIMS.properties, by setting web.services.secured property to true.
2. Create a new WS-Security Configuration
- Double-click the project in the left navigator (e.g. AsentinelWS-202)
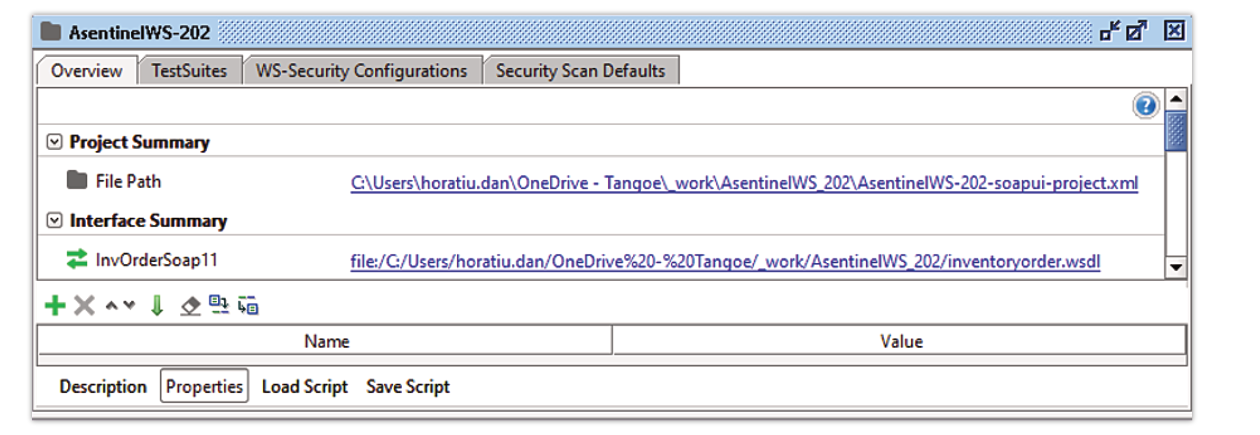
- Select WS-Security Configurations tab and then Outgoing WS-Security Configurations

- Add a new Outgoing WS-Security Configuration by pressing the green +

- Specify the name and press OK
- Tick Must Understand column for the newly created configuration
3. Add a new WSS Entry for the WS-Security Configuration
- Select the previously created WS-Security Configuration
- Add a new WSS Entry by pressing the green +
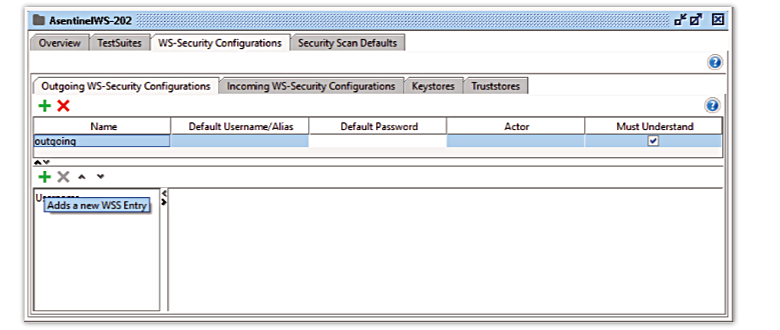
- Select Username for the type and press OK

- Fill in the details
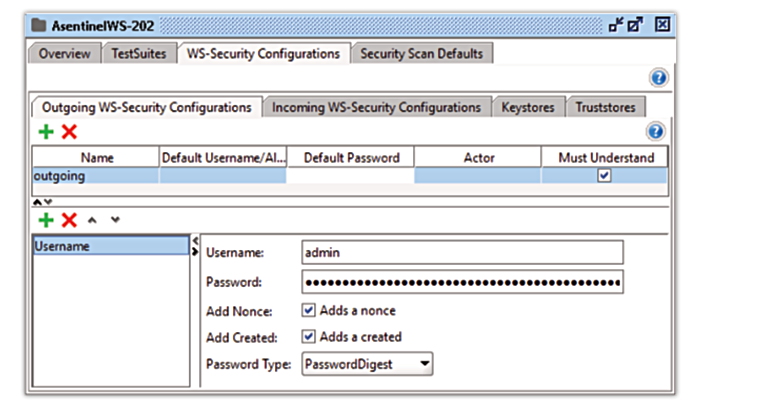
Username:
- designates the username of the user that makes the request
- should be the same that is configured on the server-side, in TIMS.properties file, web.services.username
- also, on the server-side, in TIMS.properties, user.id property should be set to the UserId of the user in the TimsUser database table.
Password:
- the hashed password of the user (for details on how to generate this, please refer to Hash Passwords with JShell section of this document)
Add Nonce:
- ticked
Add Created:
- ticked
Password Type:
- select PasswordDigest
4. Instruct InvOrdSoap11 to user the WS-Security Configuration
- Double-click InvOrdSoap11 in the left Navigator
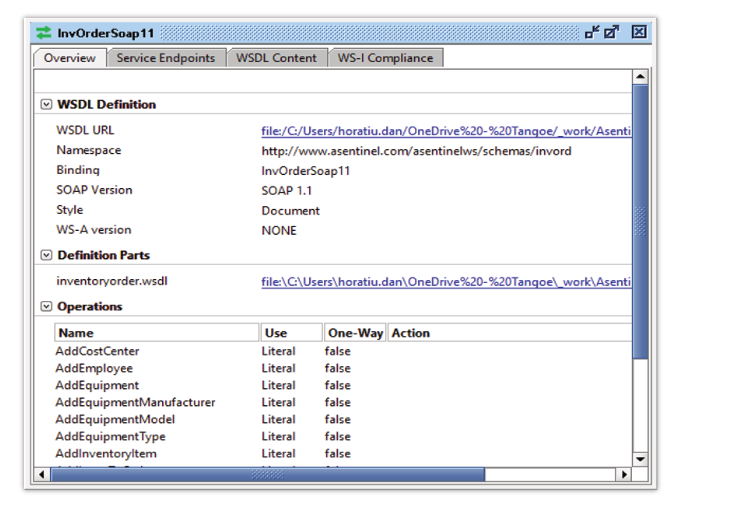
- Select Service Endpoints tab

- Click in the Outgoing WSS and choose the previously created WS-Configuration
5. Invoke Telecom Web Services
As an example, we will use GetServiceTypeIDendpoint as it is straight forward in terms of request payload and allows focusing on the important parts involved in the interaction between the client and the server.
- Expand GetServiceTypeID in the left Navigator and double-click the generated request (e.g. Request 1)

The main panel displays the request that will be sent, in terms of body.
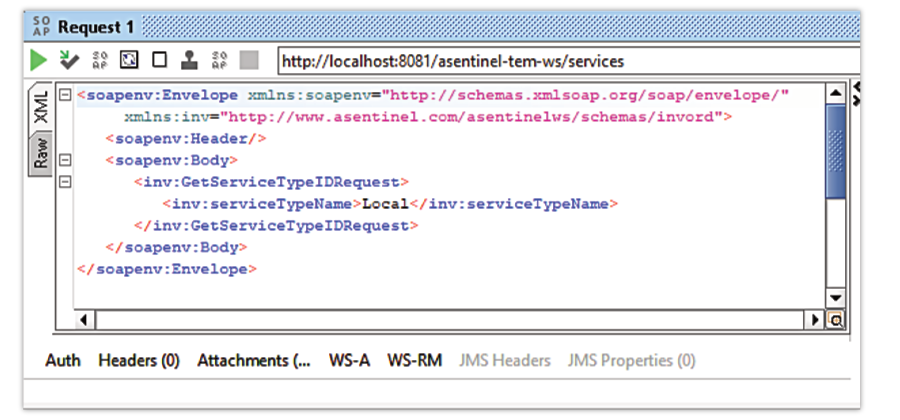
- Fill in the serviceTypeName with a name of an existing service type (e.g. Local) and press the green play button.
- The response from the server may be observed in the right part of the main panel
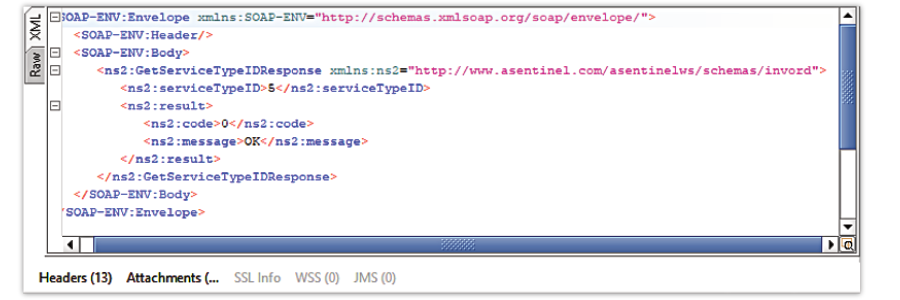
- The actual exchange of messages may be better observed in the http log console, which may be activated by pressing the designated button and the bottom of the main panel
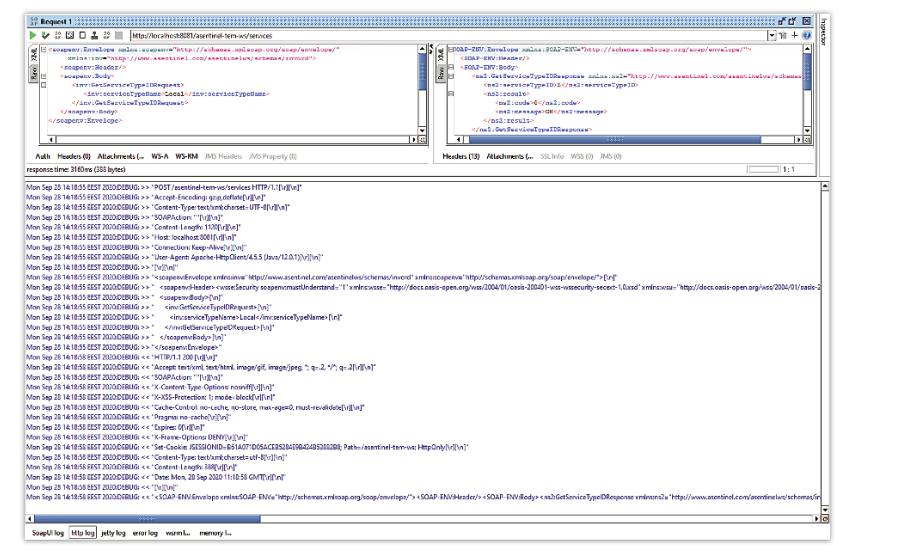
- One may observe the sent message contains the WS-Security header:
<soapenv:Envelope xmlns:inv="http://www.asentinel.com/asentinelws/schemas/invord" xmlns:soapenv="http://schemas.xmlsoap.org/soap/envelope/">
    <soapenv:Header>
        <wsse:Security soapenv:mustUnderstand="1" xmlns:wsse="http://docs.oasis-open.org/wss/2004/01/oasis-200401-wss-wssecurity-secext-1.0.xsd"
                xmlns:wsu="http://docs.oasis-open.org/wss/2004/01/oasis-200401-wss-wssecurity-utility-1.0.xsd">
            <wsse:UsernameToken wsu:Id="UsernameToken-EFD3808C143BBA196B16012919349421">
                <wsse:Username>admin</wsse:Username>
                <wsse:Password Type="http://docs.oasis-open.org/wss/2004/01/oasis-200401-wss-username-token-profile-1.0#PasswordDigest">iAMB7uNou2YLSMzelt+8meTeHCA=</wsse:Password>
                <wsse:Nonce EncodingType="http://docs.oasis-open.org/wss/2004/01/oasis-200401-wss-soap-message-security-1.0#Base64Binary">aSWE/Z7u5Tkps4L10B1dEQ==</wsse:Nonce>
                <wsu:Created>2020-09-28T11:18:54.935Z</wsu:Created>
            </wsse:UsernameToken>
        </wsse:Security>
    </soapenv:Header>
    <soapenv:Body>
        <inv:GetServiceTypeIDRequest>
        <inv:serviceTypeName>Local</inv:serviceTypeName>
        </inv:GetServiceTypeIDRequest>
    </soapenv:Body>
</soapenv:Envelope>
Hash Passwords with JShell
In order to be able to configure the WS-Security header for invoking Telecom Web Services, the client application must include the username and the hashed password in the UsernameToken entry.
This section provides a handy method for obtaining such a hashed password.
The only prerequisite is the availability of an environment where Java 9+ is installed.
- Open a command line terminal
- Navigate to the Java installation directory

- Type jshell command to launch the JShell tool

Type or paste the following code
import java.io.UnsupportedEncodingException;
import java.security.MessageDigest;
import java.security.NoSuchAlgorithmException;

String hash(String password) throws NoSuchAlgorithmException,
UnsupportedEncodingException {
final MessageDigest md = MessageDigest.getInstance("SHA-256");
md.update(password.getBytes("UTF-8"));
final byte byteData[] = md.digest();

StringBuilder sb = new StringBuilder();
for (int i = 0; i < byteData.length; i++) {
    sb.append(Integer.toString((byteData[i] & 0xff) + 0x100, 16).substring(1));
}
return sb.toString();
}
The code above:
- applies SHA-256 to the password
- takes the resulting byte array turning each element into the byte hex string representation we do & 0xFF to keep only the 8 least significant bits
- Notes:
- in Java the & operator turns the operands into integers so the & 0xFF is necessary
- single digit bytes like 0x5 or 0xA are represented with a leading 0 (05, 0A), this is why 0x100 is added to the byte (which by now is an int) and substring(1) is done afterwards
- Invoke the hash() function by typing or pasting hash (“a”)
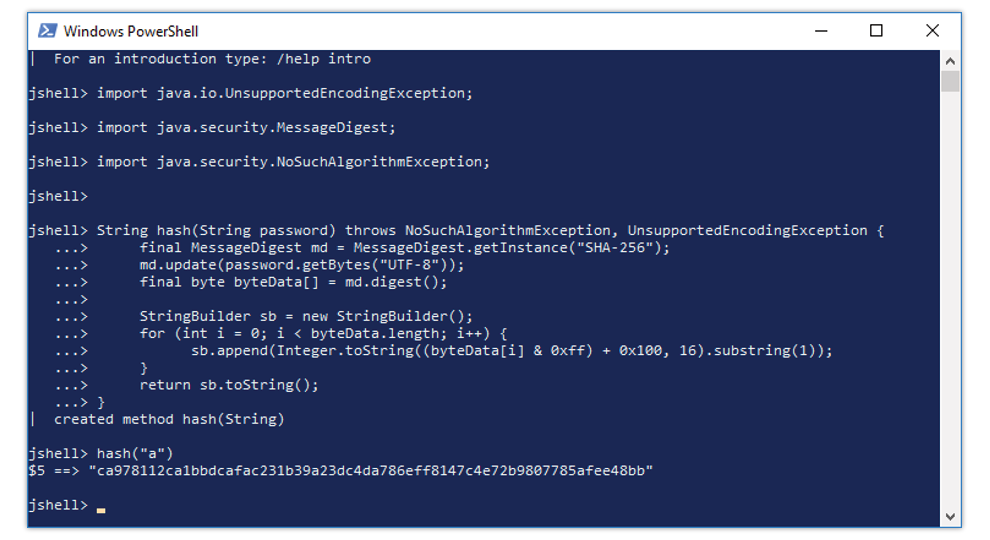
“a” parameter in the above example designates the clear text password that is hashed.
- The result is printed in the console and one may provide it as a value for wsse:Password as part of the wsse:UsernameToken that is included in the wsse:Security header of a SOAP request message.
